DIY Printable Weather Wheel
Teaching kids about the weather is often one of the first exercises in observation that we attempt. Since the weather is naturally part of our everyday life, it’s easy to make it a part of our daily habits.
I remember when mine were little and they always wanted to go to the park. Some days, especially if it was inclement weather, we couldn’t go out.
They naturally turned to little weather people giving me updates on the weather every morning. “Mommy, the sun is out so we can go to the park today!” or “Those clouds looks like rain”.
This weather wheel is a great tool for any person looking at the weather or learning about weather.
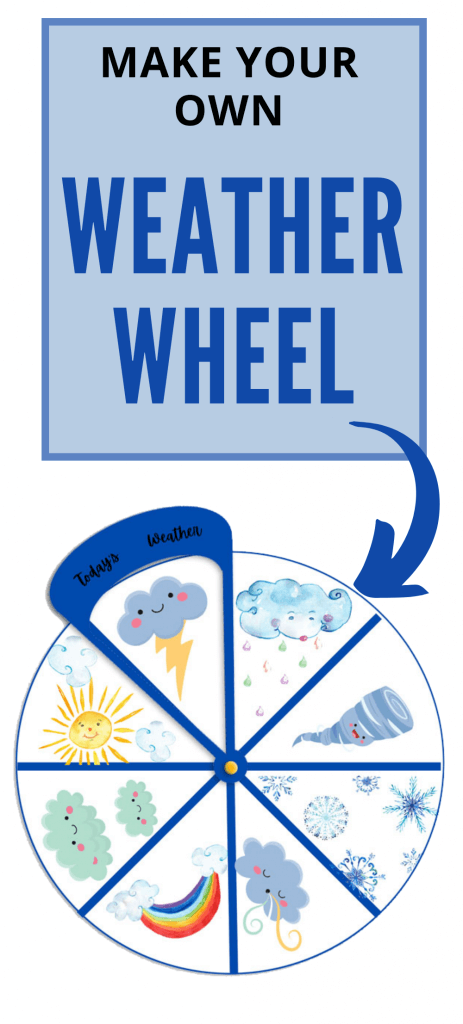
Weather Wheel
As an adult, I didn’t pay much attention to the weather until I had kids. They’ve never wavering interest in all things can be refreshing (and overwhelming).
But when they were little and everything was fascinating, I found a new joy in the weather.
They loved noting the weather each day and being responsible for giving updated forecasts as often as possible.
I love this little weather wheel and I think it’ll be great for any kid who enjoys learning about the weather.
It’s a great starting off point into talking more about the weather. For instance, if your child notices that it’s cloudy outside, you might take that as an opportunity to discuss different types of clouds and do a Types of Clouds Activity.

How to Use the Weather Wheel
The wheel comes on just one sheet of paper and is incredibly fast to put together.
I highly recommend printing on cardstock and laminating both the wheel and the viewer. The wheel will last much longer that way.
After you’ve printed and laminated, cut out the wheel and the viewer piece. Then cut out the white part in the middle of the viewer.
Once all of your pieces are ready, use something sharp (like an awl or nail) to poke a hole in the middle of the wheel and the middle of the blue circle on the viewer.
Now line up the holes with the viewer on top and push a brad through both holes. Push out the backs of the brad on the back of the wheel.
Test out your wheel to make sure that the viewer can spin but also that it will stay where you put it.
If it doesn’t spin well, loosen the brad.
If it spins too easily, tighten the brad.
And voila, now you have a weather wheel!

Value in Observing the Weather
Now that your weather wheel is ready, how will you use it?
You might want to keep an eye on the weather to catch a rainy day so you can try this mud science experiment (I imagine it would be a lot more exciting on a rainy day).
We’ve used ours primarily in two different ways.
The first way is hang it up on a window. Choose a window where you can easily see the sky and your kids have access to the window.
Then make it a habit to talk and/or ask about the weather every day. They can look out the window, determine the weather, and adjust the wheel to match.
The second way we’ve used it is on the go. We might keep it in the car for those impromptu conversations about different types of weather. Or carry it with us for a hike.
Think about where you most often discuss weather or where your kids have the most general questions. Then keep the weather wheel there to help in the discussions!

Get Your Weather Wheel Here!
Go here to get your own copy of the Weather Wheel!